The Building of Aslan
Updated 11/17/99
The Building of Aslan |
Updated 11/17/99 |
|
|
|
|
|
|
 |
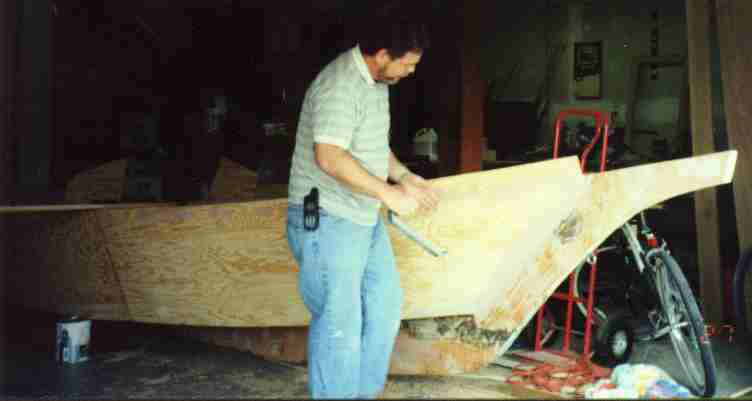
Fairing the side stringers to accept the side panels promised to be a chore, but it really didn't take that long. I was dreading it, because my belt sander is broken, and the fairing would have to be done with a surform or finish sander. The surform worked fine, and in a few hours, the starboard side was ready for plywood! |
 |
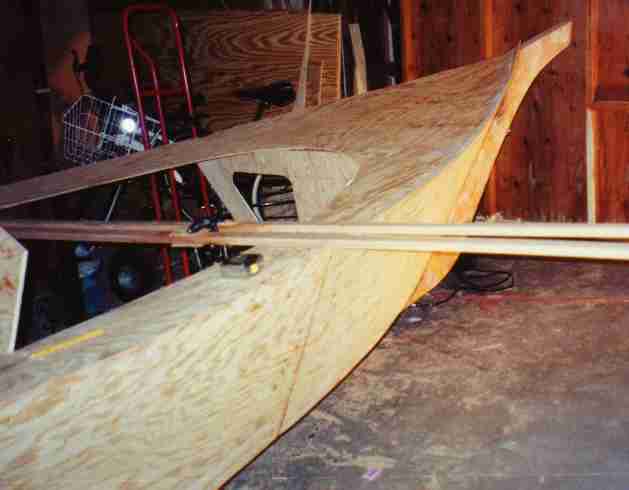
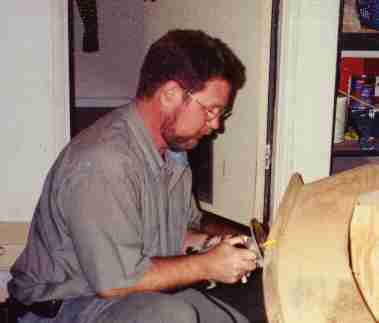
The panels are on, and I've filled in between the stem and the panel with putty, which the surform -- in my right hand -- makes smooth fast if you catch it at the right time. The black thing on my belt is not that neat little GPS that West Marine has for $99, but my "electronic leash" cell phone that ties me every waking minute to work. I wonder if it floats. |
 |
I purchased some nice Phillipine mahogany for the rub rails. They have to be over 16' long, and the longest stock I found was 14' (it fits in my Taurus, honest officer.) Ripped each board into 1 1/2" wide rails, but because they were only 14' feet long, I had to make a "scarf" joint ... so named because of the noise you make when the sawdust generated by a long angled cut collects in your sinuses. Here, the long rub rails are glued up with Weldwood, clamped and curing. I let them cure for a full 24+ hours, and even then was a little concerned about bending the 1 x 2 around the hull. I was afraid if it let loose, the neighborhood would forever talk about the time the Hagan's had a wood explosion. |
 |
The rubrail went on nicely. Nice fine grained wood, which helps.
The scarf joint is right about at the bend where there's a yellow spot
on this picture. It never did explode. I did put a clamp on
it for two days just to be sure.
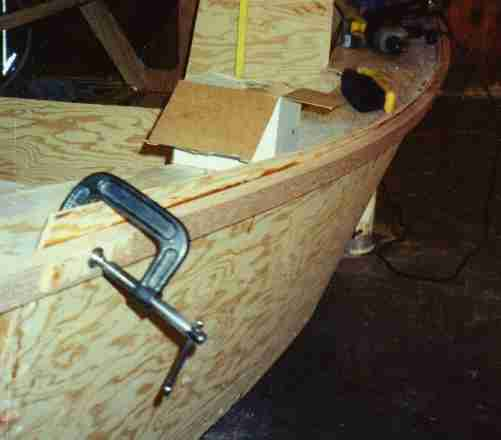
Here I've clamped the end; you can see the glue oozing out along the top. Once dry the excess plywood is trimmed off the top using the router. |
 |
Here I'm using a template guide and matching 1/2" straight bit in my router to trim off the plywood above the rub rail. Looking at this picture, I think I realize now how all that sawdust gets in the house. |
| At the stern, with both rub rails attached and the plywood trimmed. You'll notice the lack of screws between the bottom rub rail and the bottom . . . they were too far out towards the transom, angling back in, and when I went to trim the side off, I had to remove them. I did put more in, so my screw spacing is 3" anywhere below the waterline. The top rubrail will have a taffrail arcing across the top of the transom, and the bottom rubrail will appear to wrap around when the stern rubrail is attached. |
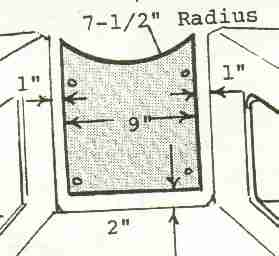 |
I decided to cut the hatch panel out of the lazarette before putting the port side panels on, since everyone said it was so hard to get to. However, I found I could mark and cut the panel out leaning over the transom. To make that "7 1/2" radius" on the top as the plans call for, I used a piece of scrap, marked off 7 1/2", and positioned it on the centerline of the proposed opening high enough so that the end intersected with the top left corner of the opening. Then an arc can be drawn easily by rotating the scrap to the opposite corner. While the drawing from the plans at left doesn't show it, the instructions show the seats 11" high, so that's how high I made the sides of this hatch opening. | 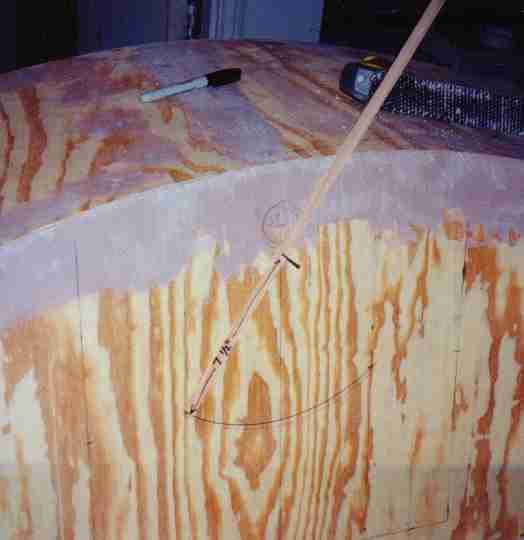 |
|
|
|
|
|
|