The Building of Aslan
Updated 1/23/01
The Building of Aslan |
Updated 1/23/01 |
|
|
|
|
|
|
 |
I had purchased these chainplates during a trip to Minney's Yacht Surplus, a wonderful place to find good stuff at cheap prices. They are heavy stainless steel. Two bolts secure them through Aslan's plywood hull and through 11/2" thick hardwood "chainplate partners" on the inside. The top bolts had to be drilled through on an angle to make enough room to install a washer and nut on the inside. |
 |
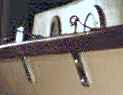
The "Bird's Mouth" method makes a fine, light mast. Because of the thin walls, I decided to use straps for the rigging rather than an eyebolt through the mast. And I need a way to finish off the top of the mast. The straps seen here are galvanized chain link fence straps which I've washed in white vinegar and painted with satin finish black Rustoleum paint. The white vinegar etches the galvanized slightly so the paint will stick to it. |
 |
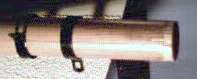
To finish off the top, I used a Dremel tool to grind down the circumfrence a bit, and used a galvanized chain link fence post-top, which I also washed in vinegar and painted with the satin finish black Rustoleum paint. Historically, the ends of spars are painted white, so this cap may be repainted (as well as the space between the straps.) But I just might flaunt tradition since I like the black against the wood so much. |
 |
The chainplates have to be installed at the right angle to provide a fair lead for the standing rigging. This combo square incorporates a protractor, and makes it easy to lock it to the 80 or 85 degree angle specified for the chainplates. |
 |
I wanted to make sure the port chainplates were located equal distance with the starboard ones installed earlier. Once the rigging is up, an error here will be pretty obvious. The plans say to measure from the joint of the side panel and the stem to locate them, but the port and starboard panels may not fit to the stem the same way. I drove a screw into the top of the stem, tied some line to it, and ran back to the installed chainplates and marked their location on the line. Then I used those marks to locate the port chainplates. We'll see if my technique works when we put the standing rigging on! |
 |
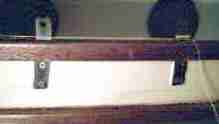
Added stern and amidships cleats 1/4/01. I used galvanized cleats to save money, and because they fit the character of the boat more (I almost went with hand-made wooden cleats, but I'm getting anxious to sail Aslan instead of just build her!) The stainless bolts go through the deck, and are backed up with large fender washers, lock washers, and nuts (all stainless.) I bedded the cleats with 3M 5200 Marine Adhesive. |
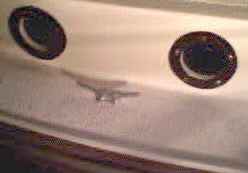 |
The amidships cleats are between the center and aft portholes, which may not be the exact widest part of the boat, but are close. I think they are close enough to hang fenders off of so the sides of the boat don't get scarred when docking, but I can't be sure until I get Aslan out of the boat house (er, garage.) The forward cleats will be installed after the bowsprit goes on, which has to happen after she's outside because of length. Boat house is too short. |
 |
Added 01/23/01
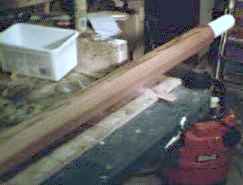
The picture quality is not that high, but this is a premium piece of douglas fir, salvaged from my dad's woodpile when we moved my parents. Best I can tell, it was bought some 30 years ago when he was building the patio cover on their house. At that time it was construction grade lumber, but now it would be sold as vertical grain douglas fir at about $3.50 a board foot. Because the forestay, which holds the mast, is attached to the bowsprit and takes the major stresses, I decided to go with a solid timber. I almost bought hardwood, until I cut into this 4 x 4 and found what a fantastic piece of wood it is. |
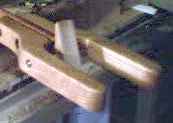 |
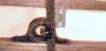
Because I'm using a hollow mast built using the "bird's mouth" method, I decided to add a tumbler or "chip" to the gaff jaws. I haven't decided if I'll go the traditional route and cover the inside of the jaws and the face of the tumbler with leather, which is then lubed up with a generous supply of lamb tallow. Haven't found any lambs in Oxnard yet, and the sources in my old books refer to the "family butcher", which in America would probably mean your family's own personal serial killer. Besides, I'm not sure how you get the tallow from the lamb is Von's Supermarket doesn't already have it under plastic wrap. So, I think lanolin, made from sheep's tallow, would be close enough. |
 |
This pivoting tumbler is concave to match the curvature of the mast and helps spread out the load over a wider area. A brass threaded rod holds the tumbler in position. Two brass nuts on each side, a stainless lock washer and brass washer against the side of the tumbler allows the tumbler to swivel. The two nuts are "locked" against each other so the swivel action doesn't unthread them. The lock washer helps keep tension against both the nuts and the washer so the tumbler doesn't swivel too freely. |
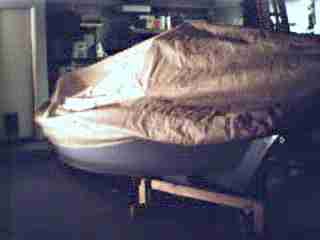 |
A cover is needed if Aslan is to be outside while the rigging is finished up. I have to keep the boat shed door open (which my wife keeps insisting is the garage door) when the bowsprit is attached to the boat. Sailboats don't have generic covers, and the usual practice is to have the boat custom fitted after all the rigging is done, just one more "chicken or the egg" type of thing to deal with. We found this car cover at Costco for $49, made by Wolf Automotive (it is their 300 series Size 5, for cars 16' 1" to 17' 6".) They have two larger sizes also, Size 6 for cars 17' 7 to 19' 6" and Size 7 for cars 19' 7" to 20' 6". Costco's largest one in stock was the Size 5. The Size 5 cover will cover the end of the bowsprit, but just barely. At the stern, the cover comes down as far as it does on the sides. |
 |
Here, the cover is about three inches below the tip of the bowsprit.
At the lower middle of the picture you can see Kris' hand which is holding
the cover together the same way cord or bungees would. I may add
velcro along these seams to make an easy way to close off the front.
This cover is about the minimum size I think would work. Its made of a breathable fabric which allows moisture to escape from under it yet still repels water on the outside. For $49, with a three year warranty, its a pretty good deal. I think the Size 6 would be a bit better. For comparison, a Size 5 is for '96 and later Ford Taurus/Sables or '97 or later Chevy Malibu, while a Size 6 is for a '83 or later Ford Crown Victoria or Chevy '95 or later Monte Carlo. Wolf Automotive is at http://www.wolfautomotive.com. |
 |
Added 2/5/01
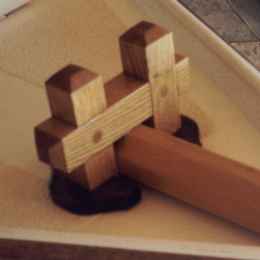
These are real photographs, scanned in at a slighty higher resolution (I think the battery in my cheapie digital camera needs replacing.) Here, the red oak bits are finished with the 5 coats of Helmsman Spar Varnish. Instead of screws, I drove birch doweling through the bits to add a decorative touch. The chocks (the dark "holders" around the bits) are phillipine mahogany, and have only had 2 coats of varnish as of this picture (I just put on the fifth coat tonight.) Attaching the bits to the keel was a chore, having to work through the hatch, which isn't quite Frank-size. I got stuck once, which is a long story, and after the requisite momentary panic, managed to extract myself. Tip to non-wiry builders: put the bits in place before putting the sides on. |
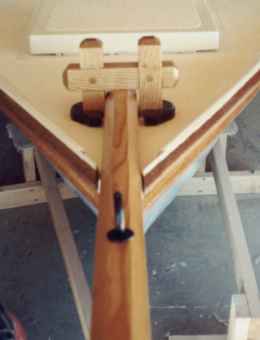 |
Here's the bowsprit, bits and chocks from the front. Trailboards will be attached to the sides of the bowsprit where the rub rails meet it, angling down along the side slightly, which helps footing when you disconnect the forestay (which attaches to a stainless eye not shown in this photo -- its 7" from the tip of the bowsprit.) The large black eye is a 10" long zinc plated eyebolt; I haven't found one in stainless yet, and suspect its a special order item. So I etched it in white vinegar and coated it with 6 coats of Rustoleum (including dipping it in the final coats.) That should make it hold until I can get a stainless eyebolt. The jib clubfoot attaches to this, and it really looks like overkill for that loading ... but it goes through the stem and secures the bowsprit to the boat. |
|
|
|
|
|
|