The Building of Aslan
a Stern Hatch Opening
The Building of Aslan |
a Stern Hatch Opening |
|
|
|
|
|
|
 |
Installing the seat framing is described in the Construction Diary starting at the entry for November 27th. This picture, with a view toward the stern, shows the port side seat top laid in place (but not attached.) On the starboard side you can see the framing itself. I was concerned about the amount of flexing the 1/4" plywood had, so I installed 2 extra supports on each side. But even with that, I think the seat tops flex too much. You can also see the hatch opening in the lazarrette that looks off center; actually, its the seats that are off. You can also see the stern hatch opening on the top of the rear deck. With the stern hatch, I think I'll trim up the lazarrette hatch and make a "semi permanent" cover for it that screws on. Its only 9" wide anyway. |
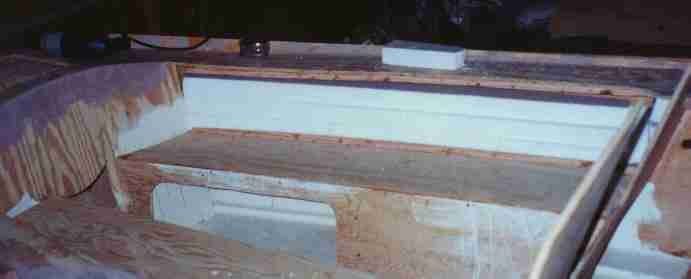 |
You can see the white paint under the port seat. On top of the seat, under the side deck, I've installed about a cubic foot of flotation foam in this "wasted" area (once the seat backs are on, you can't access this area.) More foam will go into the bow area, and possibly behind the lazarette. Each cubic foot of foam provides floation for about 62 pounds of non-floatable stuff. Having it high will help right the boat if it "turns turtle." |
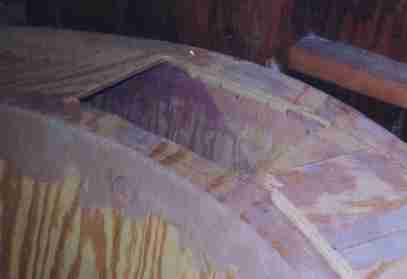 |
Another view of the stern hatch opening. The hatch cover will hinge off the taffrail (a raised trim piece that follows the curve of the stern) and nest in behind (or on top of) the splash coaming that will run on top of the lazarrette. After the boat reaches this stage, the monocoque construction really has everything rigid; cutting this large hatch opening had no effect on the rigidity of the stern, lazarrette or rear deck panel. |
|
|
|
|
|
|