The Building of Aslan
Updated 01/02/00
The Building of Aslan |
Updated 01/02/00 |
|
|
|
|
|
|
 |
I started by photocopying the patterns from the plans, and tracing them onto 1/4" plywood (masonite or hardboard works better because it doesn' t have voids, but I had the plywood handy.) Cut it straight on the table saw, and then trimmed and sanded all the parts that didn't look like the patten to make the template. | 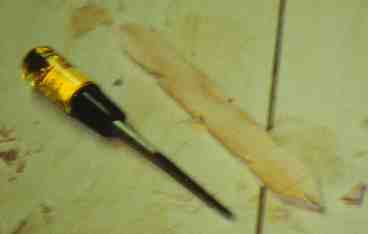 |
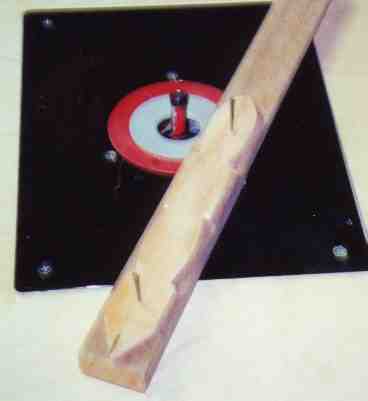 |
The template is nailed to the phillipine mahogany stock, and the router is equipped with a laminate trimming bit. You can also use double sided tape to attach the template to the stock. The router bit is adjusted so that the roller at the tip rides along the template, and the cutter cuts the stock. You do have to be careful when trying to cut rough edge grain, as the bit will grab onto the stock and send it flying. You have to train yourself not to try and grab it tighter if that happens, because changes are you'll jam your hand into the spinning router bit. Ouch. |
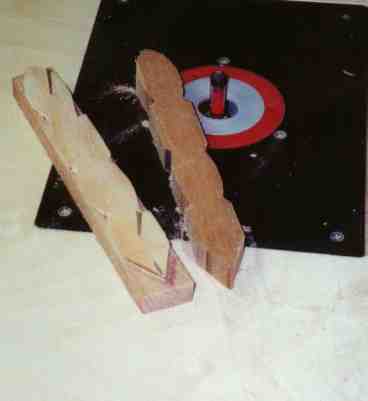 |
One rough cut piece done, and 5 to go! After all these are trimmed on the router, the edges are sanded and shaped "to taste." I was looking for a salty, rustic look so I wasn't too concerned about getting things perfect. Besides, how good could this wheel come out anyway? Its too easy to build to require a lot of work, and I can buy a finished wheel for $40. I may not even put varnish on it. Or I may toss it when its done. |
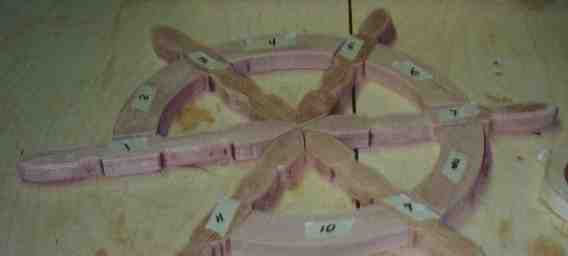 |
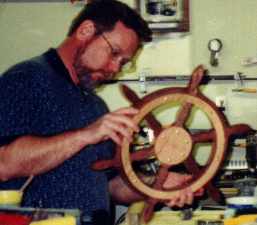
Fitting test of all the components. I found that there was a "best" fit, so I numbered the pieces. Hey, it doesn't look too bad, and I was just jamming through. Maybe I should slow down and take some time with the rest of it. |
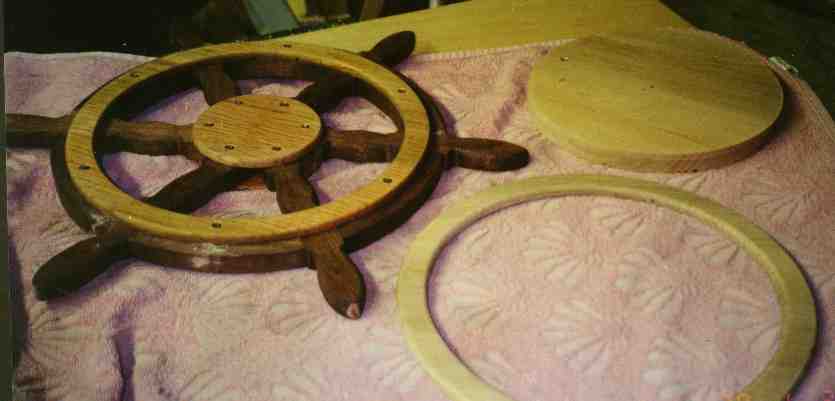 |
Pieces are stained and one side is constructed. I ended up buying brass screws because they would look better than stainless. And I used solid red oak for the lighter trim pieces (I had the stock on hand.) In the upper right you can see the "disc" left over from making the front and rear trim rings. Its looking pretty good, and I wish I had taken a little more time with it. Darn. |
 |
Now its finished, with 5 coats of Helmsman Marine Spar Varnish on it.
Jan threatened to steal it for the wall inside the house. I just
wish I had spent more time on it! Rats!
It was a nice diversion from the plywood/filler/sanding work on the boat, and I like the way it will look in the boat. |
|
|
|
|
|
|