The Building of Aslan
Updated 5/13/01
The Building of Aslan |
Updated 5/13/01 |
|
|
|
|
|
|
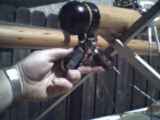 |
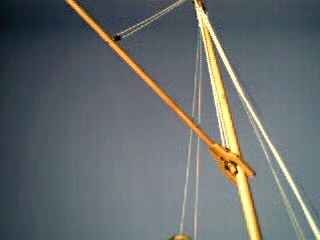
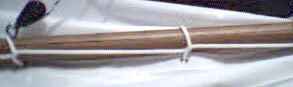
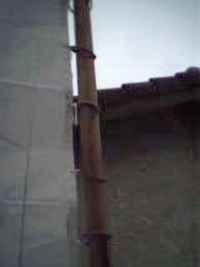
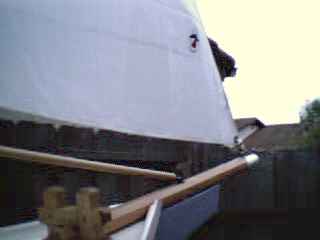
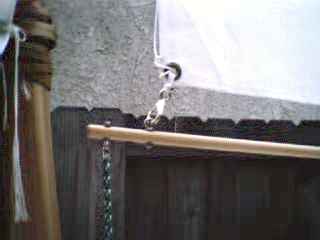
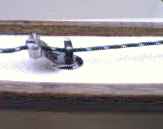
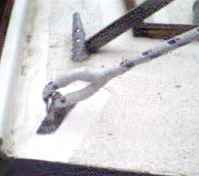
The hollow bird's mouth mast is stong, like an egg. Meaning it is great when you apply equal pressure along the outside, but can be crushed when putting pressure on two opposite sides (like when you put an eyebolt through it.) The best solution, I'm told, is to lash the blocks on where possible. Brion Toss mentioned that lashing works well for everything except peak halyards, where a lot of side to side motion causes the lashing to wear quickly. Here, I have an iron (actually a chain link fence post strap) holding on the two peak halyard blocks. The iron distributes the stress around the circumfrence of the mast, and should work fine. |
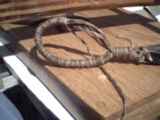 |
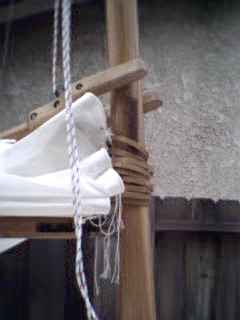
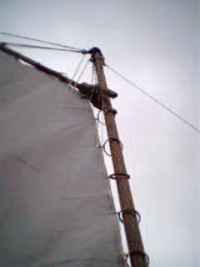
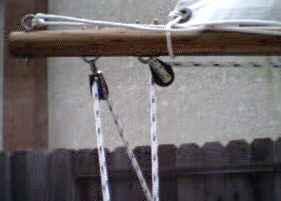
To lash on the rest of the blocks, I'm borrowing from traditional rigging techniques and making "soft eyes" to attach them. Tarred marline is used to make loops between the block and around the mast 8 times, then the loops are wrapped with more tarred marline. Placed in position, more tarred marline is wrapped around the loop to shorten the distance until the block is in the right place. |
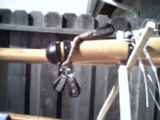 |
The soft eye for the jib halyard is placed around the mast, resting on the iron holding the peak halyard blocks. A few turns of more tarred marline lashes the soft eye to the iron, just to make sure it doesn't come loose while in this position, with the mast folded. (Note: when I rigged the jib halyard, I had to lengthen this soft eye to bring the block down below the hardware for the forestay. Otherwise, it would be "chafe city" for the halyard.) |
 |
The throat halyard soft eye is longer in this picture (but as noted above, the jib halyard eye was re-made to match the length of this one.) If you look closely, you can see the throat halyard eye is resting on an oak "thumb" glued to the mast. This prevents the soft eye from inching down the mast (although I don't think it would get far with that jib halyard block in the way!) |
 |
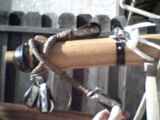
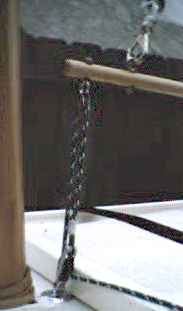
The gaff is much stronger, and I can use a stainless eyebolt to secure the block on it. I hope, anyway. If I have to, I'll put an iron here, but I think this will work. This block receives the peak halyard, and is located about 28" in from the end of the gaff, as per the plans. It does receive some stress, but it is shared with the halyard's soft eye on the end of the gaff (see below.) And the smaller diameter gives it more strength. |
 |
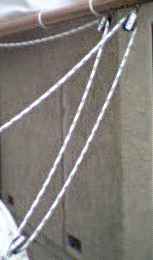
Another oak "thumb" is glued to the bottom of the end of the gaff, and the 3/8" braided peak halyard has a spliced eye on the end to fit over the end of the gaff and rest against the thumb. The peak halyard will "start" here, rove up to the top block on the iron on the mast, back down to the block on the gaff, up to the lower block on the iron on the mast, and down to the deck and cockpit. Then, when I pull on it, it should raise the gaff and sail. I hope! |
 |
Added 3/25/01
Well, last weekend I was able to get the gaff's running rigging done; the peak and throat halyard seems to work, though there some fine tuning to do at the point where the peak halyard rubs against the strop for the throat halyard block. |
 |
The mast hoops are to the dimension for gaffers, 25% larger than the mast. However, it is a tight fit around the tabernacle I've made, so in the future I may want to increase the size of the hoops a bit more. Because I tapered the mast as in the plans, the hoop diameter is really compromise; too big and the sail won't set correctly, too small and they bind. So I'll have to sail her for a bit. The sail clew, or front bottom corner, is attached to the eyebolt on the gooseneck with a shackle. Then nine mast hoops are tied to grommets in the sail, and then the sail top grommet is shackled to an eyebolt on the gaff. This takes a couple of hours, but thankfully, you only have to do it once. |
 |
The sail head and foot are tied to the gaff and boom using marline hitches. This has less tendency to slip than spiral lacing or even half hitch lacing. I have a page that shows how to tie The Marline Hitch. You'll have to use your browser's BACK button to return here. |
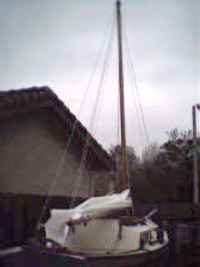 |
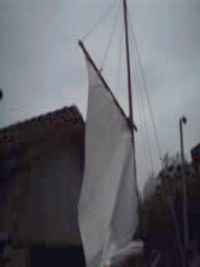
And so with great trepidation, I ask Kris to take some pictures of Aslan's main sail first being raised. |
 |
Hey, the gaff is raising nicely, and the sail is starting to raise! The mast hoops can stick at this point, as they are getting up past the tabernacle. |
 |
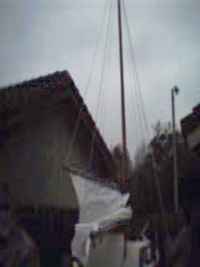
Hoping that no wind suddenly comes up, sending my boat through the fence and into prime embarrassment area (the front, where the neighbors sometimes gather to see what the heck I'm doing now), I continue to raise the main sail. |
 |
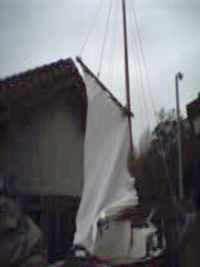
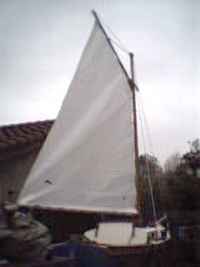
Hoo-boy! This is starting to look like a SAIL boat now! I'm watching the peak and throat halyard blocks, surprised at how well they are working even though I haven't done the fine tuning I need to do. |
 |
The sail is up! The sail is up! No glitches, no embarrassing
wind throwing me around, and where are the neighbors? No where in
sight.
Proper sail trim will have the peak halyard a bit tighter, with the wrinkles going from the peak down to the mast, rather than from the mast down to the clew as shown here. But for the first hoisting, I'll take the sloppy sail trim! |
 |
The mast hoops do tend to bind a bit, and you can see in this photo that they tend to drag on the forward portion of the mast. Its not enough to make raising or lowering the sail hard, but I'm sure the drag will cause more wear and tear on the mast. I may add a line tying each hoop together along the forward portion to keep them in a more horizontal position; it might also help getting them up and over the tabernacle. |
 |
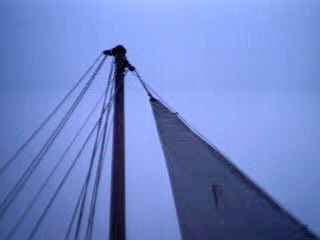
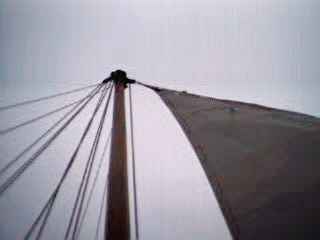
Looking up at the masthead. The halyards lead down at about a 25 degree angle in this picture, as I have them tied off to one of the grab rails on the cabin top rather than leading them to the base of the mast. The peak halyard blocks seem to work fine now that the sail has given some heft to the gaff, and it raises and lowers easily (except where the mast hoops have to be helped a bit over the mast tabernacle.) |
 |
In the plans, the jib is permanently lashed to the forestay shackle, and after lowering the mast, you stuff it in the forward hatch. I don't like that idea, and since I went ahead and bought sails instead of making them out of polytarp, I decided to make the jib removeable with snap hooks and stow it in a sailbag (just like a real sailboat.) Not really clear in this picture, but the very front corner of the jib has a bronze snap hook lashed on, and it snaps into forestay shackle. In this picture you can also see the completed jib clubfoot that makes the jib self tending. |
 |
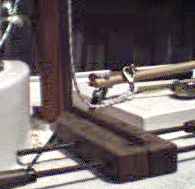
Here's the aft end of the jib clubfoot. You can see the bronze snap hook lashed on the jib and snapped into an eye on the jib clubfoot. The jib also has snap hanks that hook onto the forestay, so the whole thing can be unhooked and folded up in about 2 minutes. At the aft end of the jib clubfoot is another stainless eyebolt with a Harkin micro block in it to receive the jib sheet. |
 |
Here's a complete view of the standard rigging for the jib sheet. That's a Harken bullet block on the bottom, a single with a beckett. The jib sheet is made fast to the beckett to start, then it reeves through the micro block on the clubfoot, back down to the bullet block and out to a micro block shackled to the forward chainplate to guide it back to the cockpit. |
 |
Here's a long shot of the jib sheet reeving through a micro block shackled onto the front chainplate, as per the plans. Seems to work fine. |
 |
Back next to the cockpit, the jib sheet ends at this cam cleat arrangement
complete with fairlead. This is one of my "buys" from Minney's Yacht
Surplus last August, and if I were to buy something comparable at West
Marine, it would be over $30. This was something like $6.
NOTE: 10/7/01 - months after launch, I modified the jib sheet arrangement. The pics and commentary are located on my Jib Sheet Modifications page. |
 |
So the rigging's done, and UP goes the jib. In this picture, the jib halyard leads back instead of straight down like it will later. You may notice the lashing holding the jib halyard block has been lengthened; before, it was above the hardware holding the forestay in place, and threatened to chew up my new jib halyard. |
 |
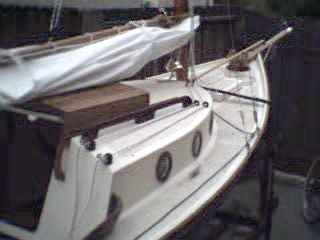
Here's a view with the jib halyard lead down properly, and a bit of breeze filling the jib. That mess of rigging aft of the mast looks like spaghetti, but the mast is able to fold down and up without tangling it. Once I have the halyards led down the mast as they should be, the amount of rigging won't look like a suspension bridge. |
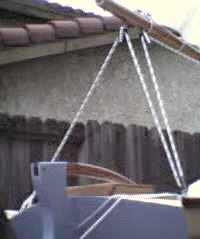 |
The main sheet controls the boom, and is therefore the most handled line on the boat. I used 3/8" for the main sheet, not because you need the strength, but because it feels better in your hands than 1/4". In the plans, using a wheel instead of the tiller, the main sheet is attached to a block on the center of the rear deck. Can't do that with a tiller, so I had to look at alternatives. One is to rig a "bridle" from aft corner to aft corner, and put a sliding block along it that takes the place of the block on the center of the deck. Another is to rig a 4-part tackle such as this one. |
 |
The mainsheet tackle starts at the aft port padeye with a pretty ugly
eye splice in the end of the main sheet. I don't like the Super Snake®
fid I purchased for splicing braided line. It was cheap but is hard
for me to use. One of these days I'll spring for a better fid and
re-do these splices. But for now, this one is strong, and it will
work.
Note: 10/7/01 - There's a bit of chafing on this line now,
so I added a galvanized thimble in the eye of the line to take the abuse.
The stainless ones in this size were over $5, but the galvanized was just
.69. Yeah, I'm cheap. |
 |
The mainsheet reeves up through the aft block on the boom. This is a full swivel block, a Harken Big Bullet 168. I wanted the full swivel on this block to allow for the wide arc the boom can make. |
 |
Two views of the starboard padeye block. This is a Harken Big Bullet 146, a single with a shackle to attach it to the padeye. As the boom swings out to starboard, the block only has to rotate clockwise, so a full swivel is not required here. | 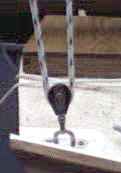 |
 |
Here's the boom off to starboard. This isn't due to real wind,
but an incredible simulation (its "incredible" as in "not credible" since
the mainsheet is slack rather than tight.)
Using a bridle or this 4-part mainsheet tackle has an advantage, especially with a gaff rig. It can help you point better into the wind because you can take some of the twist out of the sail by trimming the sail to the lee quarter (side of the boat opposite the direction of the wind) rather than amidships. The gaff at the top of the sail will automatically "trim" itself that way, so you can get a flatter sail capturing the wind with this set up. Roger C. Taylor, in his excellent book "Knowing the Ropes," says "With this rig, the boom can be hauled down hard to leeward to take some twist out of the sail when trimmed close-hauled, giving the same effect as a traveler." I highly recommend Taylor's book to anyone new to rigging; it has answered many of my questions. You can view the Amazon.com review of it by clicking this link: Knowing the Ropes. (Listing provided in association with Amazon.com.) |
 |
Updated 4/29/01
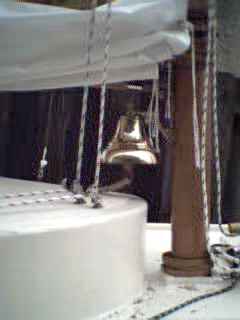
The "Finishing" page is also updated today ... you can reach it by clicking on the "Next" link in the navigation bar at the bottom. The plans have just the peak halyard run back, but I want to be able to lower the sail quickly, without climbing up on deck, so I had planned to run the throat halyard back as well.. But I didn't add enough when ordering the throat halyard line. I had 33', and it was about 10' short. I tried re-reeving the line so it was just a single purchase, but it was hard to raise that way. So I broke down and paid another $22 for 45 feet of 1/4" Stay-Set line. The stand up blocks and cam cleats are from Minney's Yacht Surplus, purchased over a year ago. Our friends from the Land of Oz "down under" will recognize the hardware ... its Australian, from a company named FICO. Rather than leading the halyards down the side of the mast, I have them going to two stand-up blocks on the cabin roof. (Oh, and the bell ... from Christmas '99, when my family actually thought I would finish the boat in a few months.) |
 |
Here you can see how the halyards run through the two cabin-top blocks, back to fairleads right at the front of that grab rail, then back to the FICO cam cleats on the edge of the cabin near the cockpit. So now both the peak and throat halyards are run back to the cockpit. The only sail handling line that isn't is the jib halyard, and everyone tells me it is useless running them back. You almost always have to go up and lower them by hand because they get hung up on the forestay (unless you rig a downhaul, which means another line ...) |
 |
I'm using a traditional method of fixing the mast straight in the mast box, pounding in "mast partners" ... tapered chocks of wood to secure the mast where I want it. To get the mast at 90 degrees to the deck, I put my large framing square in a Jorgenson Clamp on the deck, as shown at left. |
 |
Here you can see the square beside the mast before I started adjusting it. I loosened the shrouds and jockeyed the mast around a bit until I could drive in the mast partners along one side and jam the mast in position. Then I took a ladder 20 feet directly in front of the bowsprit and climbed up and sighted along the forestay and mast, visually verifying that the mast appeared in good position. I checked it again after tightening the shrouds, and it didn't move a bit (that's a good thing!) |
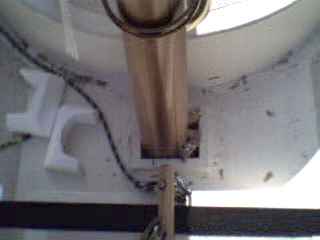 |
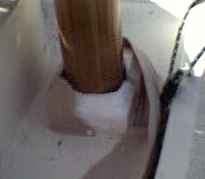
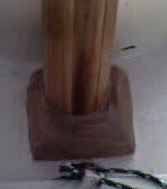
So here's the mast partners jammed in place, and the open mast box. Not a good thing on a sailboat, as water will wash on deck and mock my little 1" curb around the hole, running down into the mast box. A mast boot is the solution here. There are a lot of ways to do this, including spending about $40 for special mast boot material at a chandlery. But I decided to use a method I had read in a book about maintenance tips. It involves an Ace bandage and rope whipping compound. First, I fashioned some matching closed cell styrofoam filler pieces to give the Ace bandage something to hold on to. |
 |
The styrofoam is easy to shape using either a hacksaw blade or one of those Japanese style saws that cut on the pull stroke (they don't have any "set" to the teeth, so they cut well through the styrofoam without tearing it up.) In this photo, the styrofoam is still wider than then curb below it; later I found the Ace bandage would wrap around it neater if it was trimmed back to the curb. I nibbled away at the underside on the right piece, to accommodate the mast partners. |
 |
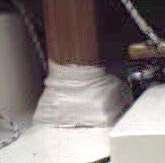
Starting the ace bandage with a brass thumtack into the curb, I wrapped it around the styrofoam form. I placed tacks at each corner on the opposite side to hold it in place (it tends to want to ride up.) |
 |
I finished it off with a couple of brass thumbtacks into the curb, and a couple into the mast. |
 |
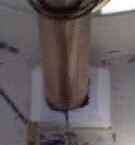
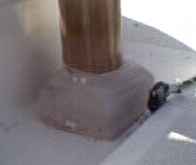
Rope whipping compound dries to a waterproof, rubbery surface. So far, I have two coats on the Ace bandage, and I want to let them dry completely before I proceed. I may have to buy another can of whipping compound to fully waterpoof this. But it is nice to use ... it just brushes on, and really seals the edges where the Ace bandage is tight against the mast. |
 |
The subsequent coats of whipping compound go a long way; the first coat really soaks in, so it is a bit deceiving. I used half the can on the first coat, but after 3 more coats, the can still has about 1/4 of the contents. The dried whipping compound takes paint well, and here it is painted the same color as the deck. |
|
|
|
|
|
|