The Building of Aslan
Updated 12/23/01
The Building of Aslan |
Updated 12/23/01 |
|
|
|
|
|
|
A topping lift is a line that helps hold up the boom anytime the sail isn't all the way up. It eases motoring around with the sail flaked and tied off to the boom, and makes it much nicer when raising the sail ... otherwise, the boom rests on the cabin top separating folks in the cockpit from each other. I have been satisfied to simply use the peak halyard as an impromptu topping lift, which works fine when the sail is tied to the gaff and the boom with sail ties. But when I go to raise the sail, and loose those ties, it is inevitable that anyone else in the cock pit gets a face full of sail. Plus, a topping lift is absolutely necessary to be able to "scandalize" the sail by dropping the gaff a bit ... the boom can remain in place instead of crashing down onto the cabin top. I didn't want to add a lot of complicated rigging to make a topping lift, and with the light loads of the Weekender, John Henry's elegant solution as found on the Weekender Boatbuilding site works great (see the message thread titled "Clever Topping Lift"). I modified it slightly as shown below.
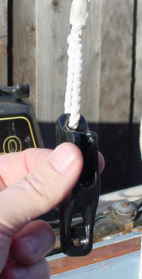 |
We start with a plastic jam cleat. This one runs about $3 at West Marine. You can see that I am using 1/4" three strand line. I drilled out the aft mounting hole of the cleat slightly to accommodate the line, then rove the line through and made an eye to splice the cleat onto the line. |
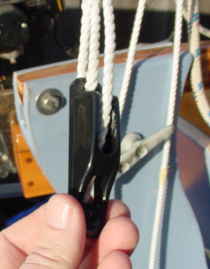 |
This shows how the other end of the line (the "bitter end" in sailor-speak) is rove through the cleat. First the bitter end is led through the eyebolt on the end of the boom, then comes back to the jam cleat as pictured here. The bitter end is then tied off to the top of the mast (I put it between the peak and throat halyard blocks as shown below). |
 |
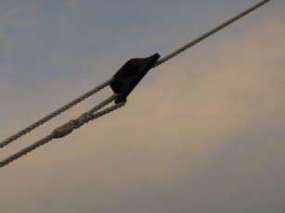
Here's a pic showing the basic concept. The line is spliced around the aft part of the cleat, goes through the eyebolt and then is rove through the jam cleat. To make a "fair lead" I used a round "rat tail" file to smooth the edges of the forward portion of the cleat where the line goes under the forward mounting hole. |
 |
Here's the "bitter end" spliced around a stainless thimble and positioned between the peak halyard and throat halyard blocks. You can see the black felt marker I used to get the spliced eye at the right point in the line. I started with 20 feet of line, and spliced the cleat to the line first. It would have been easier to make this connection first, and then splicing the cleat onto the line could be done from the ground (I had to fold the mast, tie off the line, raise the mast, and repeat ... until I found the right spot to put the eyesplice in. It worked but I felt a little silly for not being able to see it would be easier to start at the top. When I finally found the right spot, I used felt marker to mark the line.) The mast is folded down (again!) in this view. |
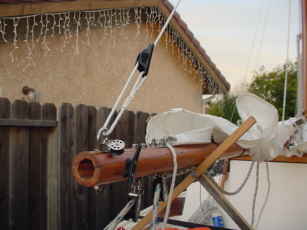 |
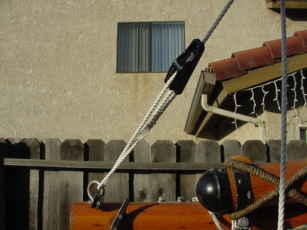
Here's how it looks with the mast up and the topping lift loose. I have about 10" of line to lower it some more if I wanted to. The crossed "sticks" supporting the boom is my boom crutch, which is only used when the boat is out of the water (they tie off to the aft cleats). To raise the boom with the toppping lift, you simply grab the black plastic jam cleat and slide it up the line. To lower it, you grab the plastic jam cleat, lift is slightly, then slide it back down. |
 |
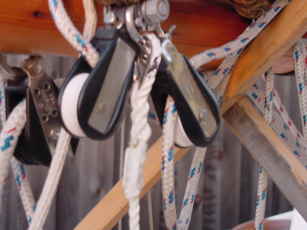
Here you can really see how the topping lift is attached to the cleat, is reeved back to through the eyebolt, and then back through the jam cleat and up to the top of the mast. |
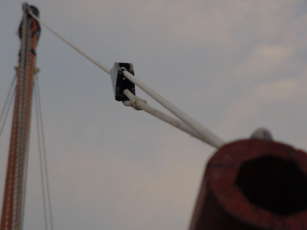 |
Another view showing the plastic jam cleat in the topping lift line.
The only concern I have is that eventually, the plastic jam cleat aft mounting hole, where I attach the topping lift, may break. It feels very strong right now, but plastic has a tendency to become brittle. When (if!) it does, I'll spring for an aluminum jam cleat (about $10.) Click this link to return to the Post Launch Modifications Page |
|
|
|
|
|